Microsoft Azure Portal: Login, Features, and Beginner’s Guide

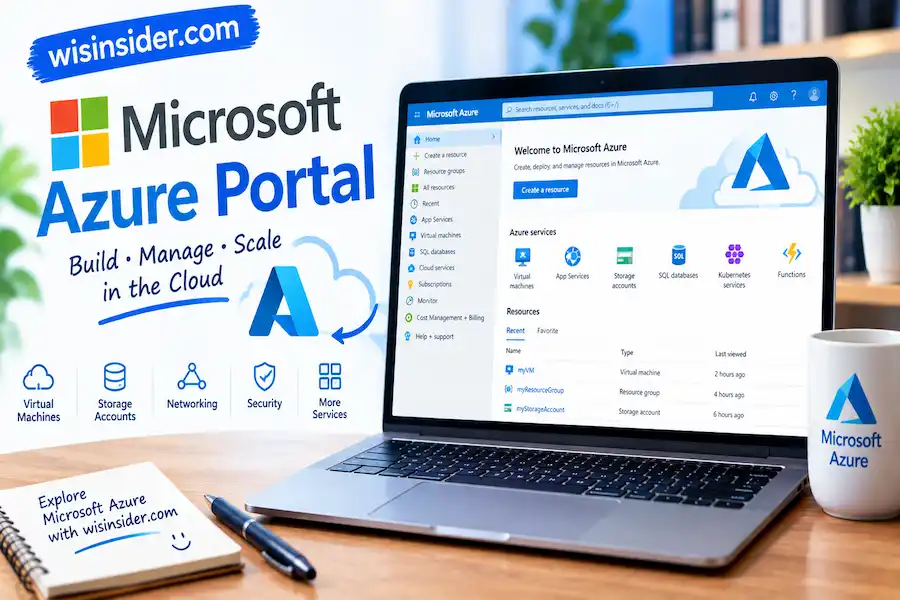
If you are trying to manage Microsoft Azure from one place, the Microsoft Azure Portal is where most of the work begins. It gives you a web-based interface for finding Azure services, creating resources, checking existing resources, managing subscriptions, and working with tools such as Azure Cloud Shell.
The portal can feel confusing when you first open it. There are subscriptions, tenants, resource groups, permissions, dashboards, and many different Azure services on the screen. The good news is that you do not need to understand everything at once. Once you know how these pieces connect, the portal becomes much easier to use.
What Is Microsoft Azure Portal?
The Microsoft Azure Portal is Microsoft’s web interface for managing Azure services and resources. Instead of controlling everything through command-line commands, you can use the portal to browse services, configure resources, view information, and change settings through a graphical interface.
You can use the portal for many common Azure tasks. For example, you might create a virtual machine, check a storage account, manage a web application, review a subscription, or open Cloud Shell.
Microsoft also provides tools inside the portal that help you search for resources and narrow down what you see. This becomes especially useful when an Azure account has many resources or more than one subscription.
For a beginner, the easiest way to think about it is simple:
Azure is the cloud platform, while the Azure Portal is one of the main interfaces you use to manage it.
Microsoft Azure Portal Login
To start using the Microsoft Azure Portal, go to the official Azure portal and sign in with the Microsoft account or organizational account connected to your Azure environment.
After signing in, you may see a dashboard with services, recent resources, shortcuts, and other information. What you see depends on your account, subscriptions, permissions, and portal settings.
If you sign in successfully but cannot find a resource you expected to see, do not immediately assume that the resource has been deleted. A different directory, subscription filter, or permission can be the reason.
That is one of the most common areas that confuses new Azure users.
What Account Do You Need for Azure Portal?
You need an identity that has access to Azure. For personal use, this can be a Microsoft account associated with Azure. Organizations commonly use work or school accounts managed through Microsoft Entra ID.
Your ability to see or change Azure resources depends on the permissions assigned to your account.
This matters because being able to sign in does not automatically mean you can manage every Azure resource.
For example, you may be able to open the Azure Portal but receive an access error when trying to change a virtual machine or storage account. In that situation, the problem is usually related to authorization rather than the portal login itself.
What Can You Do in Microsoft Azure Portal?
The Azure Portal brings many Azure management tasks into one interface. The exact options available to you depend on your permissions and the Azure services connected to your account.
Here are some of the most useful things you can do.
Create Azure Resources
You can create different types of Azure resources from the portal.
Depending on your requirements, these can include:
- Virtual machines
- Storage accounts
- Web applications
- Databases
- Virtual networks
- Azure SQL resources
- Monitoring resources
- Other Azure services
The portal usually takes you through a series of configuration screens before the resource is deployed.
For a beginner, this is often easier than learning command-line syntax first.
Manage Existing Resources
After creating a resource, you can open it from the portal and view its configuration and available management options.
For example, a virtual machine can have settings related to networking, disks, security, monitoring, and other features.
The same idea applies to other Azure services. Each resource has its own management interface.
Find Azure Resources
The portal includes resource search and filtering tools. This becomes important when an Azure environment grows.
You can use All resources to browse resources and apply filters to narrow down the list. Microsoft documents filtering by information such as resource groups and other resource details.
This is much easier than manually opening every resource when you have a large Azure environment.
Monitor Your Azure Environment
The portal also gives you access to monitoring and management information for Azure services.
Depending on the resource, you may see health information, activity, metrics, alerts, configuration details, and other operational data.
This makes the portal useful not only for creating resources but also for checking what is happening after deployment.
Understanding Azure Tenant, Subscription, Resource Group and Resource
This is one area where beginners often get lost.
You may hear several terms while using Microsoft Azure:
Tenant → Subscription → Resource Group → Resource
This is a useful beginner-friendly way to understand how the pieces relate, but the tenant is primarily an identity boundary rather than simply another resource container.
A Microsoft Entra tenant represents an organization’s identity environment. A tenant can be associated with one or more Azure subscriptions.
An Azure subscription is used to organize and manage Azure usage and resources. Every Azure resource is associated with a subscription.
A resource group is a container used to manage related Azure resources together.
A resource is the actual Azure service or object you create, such as a virtual machine, storage account, or web app.
Microsoft describes resource groups as containers for related resources in an Azure solution.
A simple example
Imagine you create a website in Azure.
Your setup could look conceptually like this:
Microsoft Entra tenant
↓
Azure subscription
↓
Website resource group
↓
Web app + database + storage resources
This mental model makes the Azure Portal much easier to understand.
What Is an Azure Tenant?
An Azure tenant is closely connected to Microsoft Entra ID, Microsoft’s identity and access management system.
A tenant typically represents an organization and contains identities, groups, applications, and other directory information.
This is important because your Azure subscription has a relationship with a Microsoft Entra tenant. Microsoft notes that tenants can have one or more subscriptions, while each Azure resource is associated with a subscription.
If you work with several organizations, you may have access to multiple tenants.
That can lead to a common problem:
You sign in successfully, but your expected subscription or resource is missing.
Before assuming something is wrong with the resource, check which directory you are currently using.
Tenant vs Subscription: What Is the Difference?
The simplest distinction is:
| Azure item | What it represents |
| Tenant | Identity and directory environment |
| Subscription | Azure service and resource management boundary |
| Resource group | Container for related resources |
| Resource | Individual Azure service or object |
A tenant and a subscription are therefore not the same thing.
You may have access to several subscriptions through your identity, and those subscriptions can contain different resources.
Microsoft provides the subscription and tenant IDs directly through the Azure Portal.
Why Can’t I See My Azure Resource?
This is one of the most useful troubleshooting questions for Azure beginners.
If a resource is missing from the Azure Portal, check these areas before doing anything else.
Check your directory
You may be signed in to the wrong Microsoft Entra directory.
Open the portal settings and look under Directories + subscriptions. Microsoft provides a directory-switching option there.
If you have access to multiple organizations, this is especially important.
Check your subscription
You might be looking at the wrong subscription.
Search for Subscriptions in the Azure Portal and check which subscriptions you can access.
Microsoft’s documentation confirms that subscription IDs can be found from the Subscriptions area of the portal.
Check subscription filters
Azure Portal settings can include subscription filters. These filters affect which subscriptions appear across portal experiences.
If a subscription is hidden by your selected filter, resources connected to that subscription may not appear where you expect them.
Check permissions
You may have access to the subscription but not the specific resource or action you are trying to perform.
If you see an authorization or access-denied message, ask the administrator responsible for the Azure environment to check your assigned permissions.
How to Check Your Azure Subscription
Finding your subscription is straightforward.
- Sign in to the Azure Portal.
- Search for Subscriptions.
- Open the Subscriptions service.
- Select the subscription you want to inspect.
- Review its name and subscription ID.
Microsoft documents this as the standard way to retrieve subscription information through the portal.
Your subscription ID can be useful when working with Azure CLI, PowerShell, APIs, support requests, and technical documentation.
How to Find Your Azure Tenant ID
You may also need your Microsoft Entra tenant ID, especially when working with applications, authentication, automation, or Azure integrations.
The tenant ID identifies your Microsoft Entra directory.
You can locate tenant information through the Azure Portal. Microsoft also provides specific instructions for retrieving tenant and subscription IDs.
Do not confuse your tenant ID with your subscription ID. They identify different parts of your Azure environment.
Azure Portal Dashboard
The Azure Portal dashboard is your customizable workspace.
It can help you keep important information in one place instead of repeatedly searching for the same services and resources.
For example, you might want quick access to:
- Important Azure resources
- Monitoring information
- Service shortcuts
- Recent resources
- Operational information
You can create and customize dashboards according to the way you work.
This is particularly useful for administrators who regularly check the same resources.
The important point is that the dashboard is not the Azure environment itself. It is a workspace that helps you organize access to information and resources.
How to Customize the Azure Dashboard
The exact dashboard options can change as Microsoft updates the portal, but the general idea remains simple.
Open the Azure Portal and use the dashboard controls to create or customize a workspace.
You can arrange useful tiles and information so that frequently used resources are easier to reach.
Microsoft describes dashboards as focused workspaces and allows users to create additional dashboards. New dashboards are private by default, while dashboards can also be shared when appropriate.
For a beginner, I recommend keeping the dashboard simple.
Adding too many tiles can make it harder, not easier, to find what you actually need.
What Is Azure Cloud Shell?
Azure Cloud Shell is a browser-based command-line environment for managing Azure resources.
It gives you two main shell choices:
- Bash
- PowerShell
You can access Cloud Shell directly from the Azure Portal.
The useful part is that you do not need to install and configure every Azure command-line tool on your own computer just to perform basic management tasks.
Microsoft describes Cloud Shell as an authenticated, browser-accessible terminal for managing Azure resources. It can be opened from the Azure Portal and other Microsoft interfaces.
For developers and cloud administrators, this can save time.
Azure Portal vs Azure Cloud Shell
The difference is easier to understand when you think about how you want to work.
| Azure Portal | Azure Cloud Shell |
| Graphical interface | Command-line interface |
| Uses menus and screens | Uses commands |
| Beginner-friendly for many tasks | Useful for automation and technical work |
| Good for visual resource management | Good for CLI and PowerShell commands |
| Runs in your browser | Runs in a browser-based shell |
You do not have to choose one forever.
Many Azure users switch between the portal and Cloud Shell depending on the task.
For example, you might use the portal to inspect a resource and Cloud Shell to run a command against it.
Does Azure Cloud Shell Keep Your Files?
This is an important detail that is easy to miss.
Cloud Shell runs on a temporary host. Your session can end after a period of inactivity, but persistent storage can be used when you need files to remain between sessions.
Microsoft currently documents a persistent $HOME location backed by Azure storage, while Cloud Shell itself uses temporary session infrastructure.
When you start Cloud Shell for the first time, you can be asked about storage and whether you want to mount a storage account.
If you need files to remain available for later sessions, persistent storage matters.
There is also a cost point to understand: the Cloud Shell compute environment is provided without a separate machine charge, but persistent storage uses Azure Files and normal storage charges can apply.
Azure Portal Permissions and Access
Seeing a resource and managing a resource are not always the same thing.
Azure uses permissions to control what users can do.
For example, one user might be allowed to view a resource while another user can modify or delete it.
If you receive an Access Denied message, check the permissions assigned to your account.
Azure role-based access control, commonly called Azure RBAC, is used to manage access to Azure resources.
The scope can also matter. Permissions can be applied at different levels, such as a subscription, resource group, or individual resource.
This is why two people working in the same Azure environment can see different options.
Microsoft Azure Portal Search
The search function becomes one of your best friends once an Azure environment gets busy.
Instead of browsing through every service manually, search for what you need.
For example, you can search for:
- Subscriptions
- Resource groups
- Virtual machines
- Storage accounts
- App Services
- Azure Monitor
- Microsoft Entra ID
- Cloud Shell
You can also use resource filtering when you need to narrow down a large list of Azure resources. Microsoft provides filtering and saved-view options in the portal for resource information.
This is a simple habit, but it can save a lot of time.
Is Microsoft Azure Portal Free?
The Azure Portal is the management interface, but that does not mean every Azure service you use through it is free.
Azure services can have their own pricing.
Cloud Shell itself is provided as a free service, but persistent storage and other Azure resources can generate charges.
So if you are experimenting with Azure, always check the pricing information for the specific service you create.
A common beginner mistake is to focus only on the portal and forget that the resources being created inside Azure may have separate costs.
Can You Use Azure Portal on a Phone?
Microsoft also supports Azure management from mobile devices through the Azure mobile app.
Cloud Shell is available through the Azure mobile app as well, allowing users to run Bash or PowerShell commands from the mobile experience.
A phone can be useful when you need to check something quickly or perform a small administrative task.
For larger deployments and detailed configuration, however, a desktop browser is usually more practical because you have more screen space and easier access to multiple settings.
A Simple Microsoft Azure Portal Workflow for Beginners
If you are opening Azure Portal for the first time, do not try to learn every service immediately.
Start with this basic workflow:
Step 1: Sign in
Open the Azure Portal and sign in with the account that has Azure access.
Step 2: Check your directory
If you work with multiple organizations, confirm that you are using the correct Microsoft Entra directory.
Step 3: Check your subscription
Find Subscriptions and confirm that the subscription you expect is available.
Step 4: Find a resource group
Open the resource groups associated with your subscription.
Step 5: Open a resource
Choose one resource and spend some time learning its Overview, Settings, Monitoring, and Access options.
Step 6: Try Cloud Shell
Once you are comfortable with the basic portal, open Cloud Shell and explore Bash or PowerShell.
This approach is much less overwhelming than trying to learn every Azure service at once.
Common Microsoft Azure Portal Problems
Most beginner problems fall into a few predictable areas.
“I can log in, but my subscription is missing.”
Check your current directory and subscription filters first. The Azure Portal allows you to manage directories and subscription filters through Portal settings.
“My resource is not showing.”
Confirm the subscription, resource group, directory, and filters. Also check whether your account still has access to the resource.
“I can see the resource but cannot change it.”
This can be a permissions issue. Your account may have read access without having the role required for the action you are attempting.
“Cloud Shell stopped.”
Cloud Shell sessions can time out after 20 minutes without interactive activity. Persistent storage is separate from the temporary shell host.
“I don’t understand all the Azure menus.”
That is normal when you first start. Focus on the resources you actually need instead of trying to memorize the entire portal.
Microsoft Azure Portal Security Basics
Your Azure Portal account can provide access to valuable cloud resources, so basic security should not be ignored.
Use a strong sign-in method and follow your organization’s Microsoft Entra security policies.
Do not share your Azure credentials with another person just because they need temporary access.
Instead, use the appropriate Azure access and role-management process.
Also pay attention to which tenant and subscription you are working in before making changes. A small mistake in the wrong subscription can affect completely different resources.
For administrators, permissions should be given according to the work a person actually needs to perform rather than giving everyone unrestricted access.
Microsoft Azure Portal vs Azure Resource Manager
These names can sound similar, but they refer to different things.
The Azure Portal is the graphical interface you use to interact with Azure.
Azure Resource Manager (ARM) is the management layer that handles Azure resources and management operations.
The portal is therefore one way to interact with Azure’s management capabilities. You can also work with Azure through other interfaces, including Azure CLI, Azure PowerShell, APIs, and templates.
Microsoft’s documentation describes management scopes such as management groups, subscriptions, resource groups, and resources, with settings applied at different levels depending on the scope.
For beginners, there is no need to go deep into ARM immediately. Understanding the portal and basic resource structure should come first.
The Easiest Way to Think About Azure Portal
If Azure feels complicated, reduce it to four questions:
Where am I?
Check your Microsoft Enter directory or tenant.
Which Azure account area am I using?
Check your subscription.
Which group contains the thing I need?
Check the resource group.
What exactly am I managing?
Open the resource.
This simple process solves a surprising number of Azure navigation problems.
It also gives you a useful habit: before troubleshooting a missing resource, verify your directory and subscription first.
FAQs
What is Microsoft Azure Portal used for?
Microsoft Azure Portal is a web-based interface for managing Azure services and resources. You can use it to create resources, view existing resources, manage settings, inspect subscriptions, work with resource groups, and access tools such as Cloud Shell.
How do I log in to Microsoft Azure Portal?
Open the official Azure Portal and sign in with an account that has access to Azure. After signing in, check your current directory and subscriptions if you do not see the resources you expect.
Why can’t I see my Azure subscription?
The wrong Microsoft Entra directory, a subscription filter, or missing permissions can prevent a subscription from appearing where you expect it. Check Directories + subscriptions in Portal settings and confirm that the correct subscription is selected.
What is the difference between Azure Portal and Cloud Shell?
Azure Portal provides a graphical interface for managing Azure. Cloud Shell provides a browser-based command-line environment with Bash or PowerShell. Both can be used to manage Azure resources, but they suit different working styles.
Is Azure Cloud Shell free?
Microsoft provides the Cloud Shell compute environment without a separate machine charge. However, persistent storage uses Azure Files, which can create normal storage charges.
Where can I find my Azure Tenant ID?
You can find tenant information through the Azure Portal. Microsoft provides the Tenant ID and subscription ID through the portal’s subscription and directory-related areas.
Can I use Microsoft Azure Portal on mobile?
Yes. Microsoft provides the Azure mobile app, and Cloud Shell is also available through the mobile experience.
Why do I get an Access Denied message in Azure Portal?
An Access Denied message usually means your account does not have the required permission for the action or resource. The resource may be visible to you even when your assigned role does not allow you to modify it.
Final Thoughts
The Microsoft Azure Portal becomes much easier once you stop looking at it as one huge collection of Azure services. Start with the basics: identify your tenant, confirm your subscription, find the right resource group, and then open the resource you need.
From there, tools such as dashboards, resource filters, Cloud Shell, Azure CLI, PowerShell, and monitoring features become easier to understand because you already know where they fit.
The most useful practical habit is simple: when something appears to be missing in Azure, check the directory, subscription, filters, and permissions before assuming the resource itself is gone. That small troubleshooting routine can save a lot of unnecessary searching and confusion.
Azure has many advanced features, but you do not need to master them all on day one. Learn the portal around the work you actually need to do, and the rest of the Azure environment starts making much more sense.
For more Windows tips, you can also explore WISInsider Software.