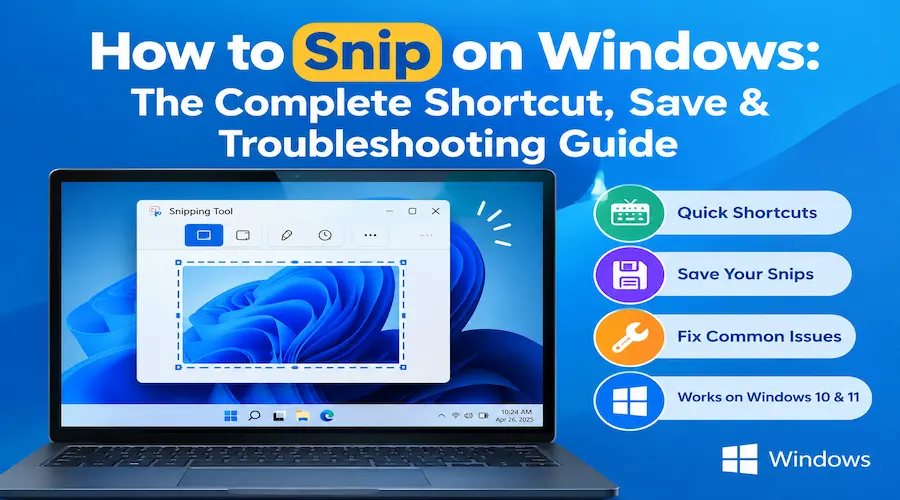
How to Snip on Windows: The Complete Shortcut, Save & Troubleshooting Guide (2026)

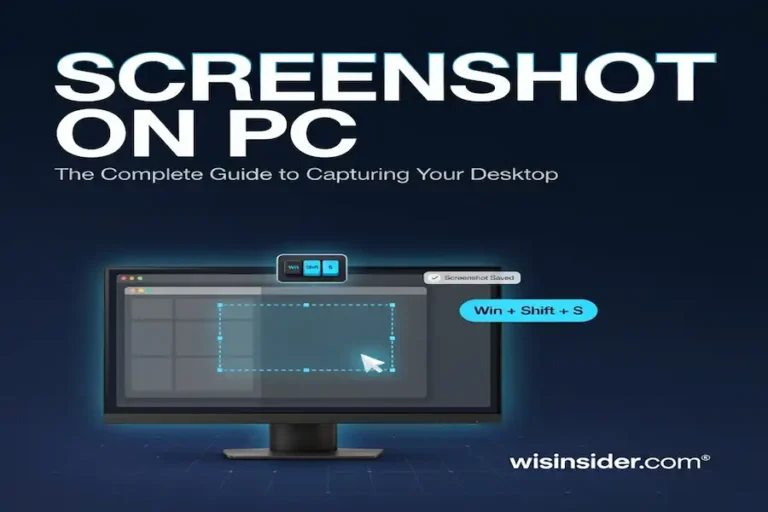
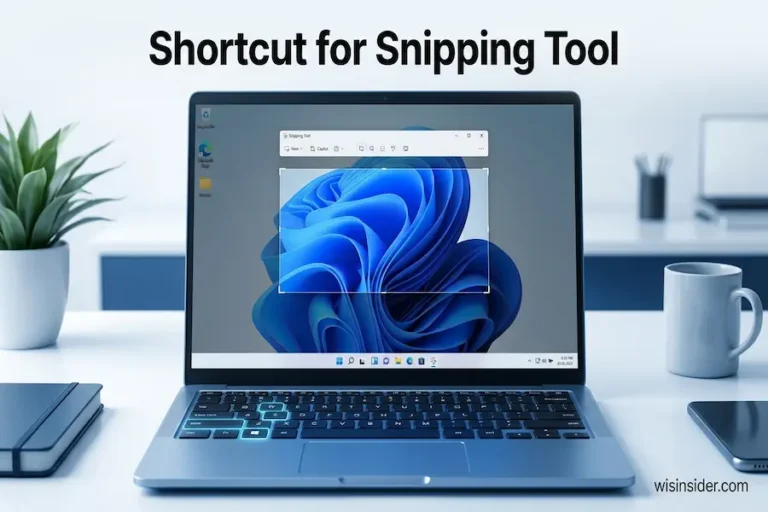
Short answer: Press Windows key + Shift + S to snip on Windows. Your screen dims, a toolbar appears at the top, you drag over what you want, and the snip is copied to your clipboard. Paste it anywhere with Ctrl + V.
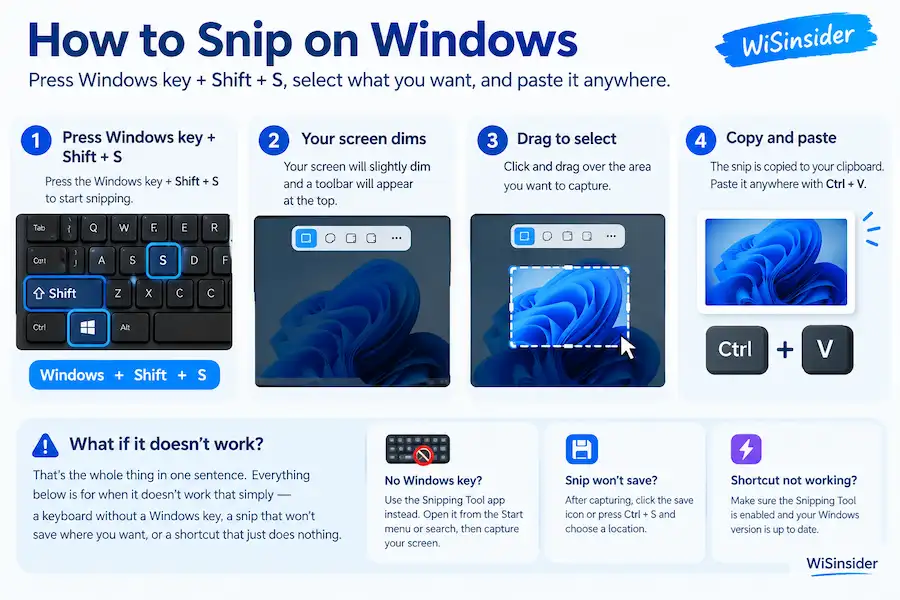
That’s the whole thing in one sentence. Everything below is for when it doesn’t work that simply a keyboard without a Windows key, a snip that won’t save where you want, or a shortcut that just does nothing.
Key takeaways:
Win + Shift + S is the snip shortcut on both Windows 10 and Windows 11
Ctrl + Shift + S is not a Windows shortcut that’s why it’s not working for you
Snips go to your clipboard first, and only to a file if you save them
Print Screen can be remapped to open snipping instead
How to Snip on Windows in 4 Steps (The Fast Version)
This works on Windows 10 and Windows 11 with no downloads and no setup. Follow these four steps and you’re done.
Press Windows key + Shift + S. Your screen dims and a small toolbar appears at the top.
Pick a mode from the toolbar rectangle, freeform, window, or full screen.
Drag over the area you want to capture.
Paste it with Ctrl + V, or click the notification to open the editor and save.
That’s the core of it. The snip lands on your clipboard immediately, which is why paste works even if you never save a file.
Every Way to Open the Snipping Tool (Pick the One That Fits Your Keyboard)
There’s more than one route in, and knowing all of them saves you when one is blocked. Here are the five reliable methods.
Keyboard shortcut: Win + Shift + S fastest, opens the overlay directly
Search: Press the Windows key, type “Snipping Tool,” hit Enter
Start menu: Start > All apps > Snipping Tool
Run box: Press Win + R, type snippingtool, hit Enter
Pin it: Open the tool once, right click its taskbar icon, choose Pin to taskbar for one click access
Bonus shortcut: Win + Shift + R opens the same overlay in screen recording mode on Windows 11.
4 Snip Modes Explained (And When to Use Each)
The mode you pick changes what gets captured. Most people use one mode forever without knowing the other three exist.
Mode What it captures Best for
Rectangular A box you drag Most screenshots part of a page or document
Free-form Any shape you draw by hand Odd-shaped areas, circling one item
Window One open window, cleanly App screenshots, error dialogs, browser windows
Full screen Everything on your display Tutorials, multi-monitor captures
Quick tip: window snip is the underused one. It gives you a clean edge with no desktop background bleeding in, which makes it the best mode for anything you’ll share professionally.
Why Is My Ctrl + Shift + S Not Working? (The Real Reason)
Here’s the answer nobody gives you straight: Ctrl + Shift + S is not a Windows snipping shortcut. It never was. The correct shortcut is Windows key + Shift + S.
If you’ve been pressing Ctrl + Shift + S and getting nothing, one of these is why:
You’re thinking of Firefox. Ctrl + Shift + S opens Firefox’s built-in screenshot tool, so it works in that browser and nowhere else.
You’re thinking of Photoshop or Office. In most apps, Ctrl + Shift + S is “Save As.”
Muscle memory from another OS or app. Several screenshot tools use Ctrl + Shift + S as their custom hotkey.
The fix: use Win + Shift + S instead. If you genuinely prefer Ctrl + Shift + S, you can’t reassign it inside Snipping Tool, but you can create a desktop shortcut to the app and assign a custom hotkey in its Properties > Shortcut key field.
Still nothing? Jump to the troubleshooting checklist in section 13.
How to Snip on Windows Without the Windows Key
Plenty of keyboards make the Windows key unusable gaming keyboards with Win-lock on, corporate machines with it disabled, a broken key, or a Remote Desktop session. Here are four routes that don’t need it.
Use Print Screen instead. Go to Settings > Accessibility > Keyboard and turn on “Use the Print Screen key to open screen capture.” Now PrtScn alone opens the snipping overlay.
Open the app directly. Search for Snipping Tool in the taskbar search box, or pin it so it’s one click away.
Use Run. Press Ctrl + Shift + Esc to open Task Manager, then File > Run new task, and type snippingtool.
Use Alt + Print Screen. This copies just the active window to your clipboard no Windows key involved at all.
If your keyboard has no PrtScn key (common on compact laptops), try Fn + PrtScn, Fn + Insert, or Fn + Windows + Space depending on the manufacturer. Check your laptop’s key legend for a small camera icon.
How to Snip and Save Straight to the Desktop
By default, snips go to your clipboard and if auto-save is on to Pictures > Screenshots. Getting them onto your desktop takes one of these three approaches.
Save As, manually. After snipping, click the notification to open the editor, press Ctrl + S, and choose Desktop as the location. Windows remembers the last folder you used.
Change the default folder. Open File Explorer, right-click the Screenshots folder, choose Properties > Location > Move, and point it at Desktop. Every future auto-saved snip lands there.
Use Win + Print Screen. This captures the full screen and saves it automatically as a PNG in Pictures > Screenshots no editor, no clicks.
Important to know: Win + Shift + S does not create a file on its own. It copies to the clipboard. If you close the notification without saving, that snip is gone once you copy something else.
Where Do Snips Actually Go on Windows?
This trips up more people than any other part of the tool. Different shortcuts send your capture to different places.
What you pressed Where it goes
Win + Shift + S Clipboard only (plus the editor if you click the notification)
Print Screen Clipboard only
Alt + Print Screen Clipboard only (active window)
Win + Print Screen Saved as a file in Pictures > Screenshots
Saved from the editor Wherever you chose in the Save As box
Screen recordings Videos > Screen Recordings
Rule of thumb: if the Windows key was in the combo and Print Screen was pressed, you got a file. Otherwise you got a clipboard copy.
How Do You Cut and Paste With the Snipping Tool?
Snipping Tool doesn’t “cut” in the traditional sense it copies. But the copy and paste workflow is genuinely fast once you know it.
Press Win + Shift + S and drag over the area you want.
The snip is automatically copied to your clipboard. No extra step needed.
Click into your email, Word doc, Teams chat, or Slack message.
Press Ctrl + V to paste it in.
If you need to edit first: click the notification that appears in the bottom right corner, make your changes in the editor, then press Ctrl + C to re copy the edited version before pasting.
Pro tip: press Win + V to open clipboard history. If you snipped something three copies ago and lost it, it may still be there.
How Do I Crop a Screenshot on Windows?
Cropping after the fact is common you grabbed too much or you need a tighter frame. Here are three ways, ordered by speed.
Crop in Snipping Tool
The fastest option if the snip is still open.
Open the snip in the Snipping Tool editor (click the notification, or open the saved file with the app)
Click the Crop icon in the toolbar
Drag the corner handles to frame what you want
Click the checkmark, then Ctrl + S to save
Crop in the Photos app
Best for a screenshot you already saved.
Double-click the image file to open it in Photos
Click Edit image (or press Ctrl + E)
Drag the crop handles, then click Save or Save as copy
Crop in Paint
The fallback that works on every Windows version ever made.
Open the image in Paint
Use the Select tool to drag a box around what you want
Click Crop
Press Ctrl + S
Worth knowing: on a Copilot+ PC, Snipping Tool has a Perfect Screenshot feature that auto-tightens the capture around on-screen content, so you often skip cropping entirely.
How Do I Snip in Chrome?
Win + Shift + S works fine over a Chrome window, but browsers offer better options for full pages and specific elements. Here are your four routes.
Win + Shift + S works over Chrome like any other window. Good for a visible portion of a page.
Chrome Dev Tools full-page capture press F12, then Ctrl + Shift + P, type “screenshot,” and pick Capture full size screenshot. This grabs the entire page including everything below the fold, for free.
Capture one element in the same Dev Tools command menu, choose Capture node screenshot after selecting an element. Perfect for grabbing a single card or table cleanly.
Chrome extensions if you do this daily, an extension adds a toolbar button, though Dev Tools covers most needs without installing anything.
One thing to expect: streaming sites with DRM protection (Netflix, Prime Video) will often produce a black rectangle instead of the video frame. That’s copy protection, not a bug in your snipping tool.
How to Take a Scrolling Screenshot on Windows for Free
Snipping Tool cannot capture scrolling pages natively, and most guides use this as a reason to sell you software. You don’t need to buy anything. Here are two free methods.
Chrome or Edge DevTools: press F12 > Ctrl + Shift + P > type “screenshot” > Capture full size screenshot. Saves the full page as a PNG.
Firefox built-in: right-click anywhere on the page, choose Take Screenshot, then click Save full page. No extension required.
When a paid tool actually makes sense: if you need scrolling capture inside desktop apps (not just browsers), or you’re doing it dozens of times a day, a dedicated capture tool earns its price. For occasional webpage captures, the free methods above are enough.
How to Capture a Dropdown or Right Click Menu
Menus close the moment you press a shortcut, which is why this feels impossible. The delay timer solves it.
Open Snipping Tool from the Start menu (not via shortcut)
Click the Delay option and choose 3, 5, or 10 seconds
Click New to start the countdown
Open your dropdown or right-click menu before the timer ends
When the screen dims, drag over the menu
Alternative: press Print Screen while the menu is open. It captures the whole screen including the open menu, and you can crop down afterwards.
Snipping Tool Not Working? Run This Checklist
Work through these in order the first three fix the large majority of cases.
Check you’re using the right keys. Win + Shift + S, not Ctrl + Shift + S.
Enable the Print Screen shortcut. Settings > Accessibility > Keyboard > turn on “Use the Print Screen key to open screen capture.”
Check for a shortcut conflict. Apps like OneDrive, Dropbox, Discord, Nvidia GeForce Experience and Greenshot often hijack Print Screen or Win + Shift + S. Close them one at a time and re-test.
Restart the app. Open Task Manager (Ctrl + Shift + Esc), find Snipping Tool, click End task, then reopen it.
Check notifications are on. Settings > System > Notifications > make sure Snipping Tool is allowed. If notifications are off, the snip still works you just never see the prompt to edit it.
Turn off Focus Assist / Do Not Disturb. It suppresses the snip notification.
Repair or reset the app. Settings > Apps > Installed apps > Snipping Tool > Advanced options > Repair, then Reset if repair fails.
Update Windows. Settings > Windows Update > Check for updates. Several snipping bugs have been patched this way.
Check your Windows key isn’t locked. Gaming keyboards often have a Win-lock toggle look for a lock icon on the Win key or an Fn combination.
How to Download or Reinstall the Snipping Tool
Snipping Tool ships with Windows, so you should never need to download it. If it’s genuinely missing, here’s how to get it back.
Microsoft Store: open the Store app, search “Snipping Tool,” and install the official Microsoft-published listing.
Repair first: Settings > Apps > Installed apps > Snipping Tool > Advanced options > Repair. This fixes most “missing” cases without a reinstall.
Re-register with PowerShell: open PowerShell as administrator and run Get Appx Package *Screen Sketch* | Reset Appx Package.
Safety note: only install it from the Microsoft Store. Third party sites offering a “Snipping Tool download” are not distributing a Microsoft product, and there’s no legitimate reason to get it anywhere else.
How to Use Snipping Tool in Windows 10 vs Windows 11
The shortcut is identical on both, but the app around it changed. Here’s what’s actually different.
Feature Windows 10 Windows 11
Win + Shift + S shortcut Yes Yes
App name Snipping Tool + Snip & Sketch (two apps) Snipping Tool (merged into one)
Screen recording No Yes (Win + Shift + R)
Text extraction (OCR) No Yes (Text Actions)
Quick Redact No Yes
Color picker & ruler No Yes
Perfect Screenshot No Copilot+ PCs only
Delay timer Yes Yes
If you’re on Windows 10: everything in this guide’s core sections still applies. You just won’t find the recording, OCR, or redaction features.
Which Screenshot Method Should You Use?
There are six ways to capture your screen on Windows, and picking the wrong one wastes time. Match your situation to the row.
Your situation Use this Result
Grab part of the screen Win + Shift + S Clipboard
Grab everything, save a file Win + Print Screen File in Pictures > Screenshots
Grab one window only Alt + Print Screen Clipboard
Grab everything, paste it Print Screen Clipboard
Record a video clip Win + Shift + R File in Videos > Screen Recordings
Capture a full webpage Chrome DevTools or Firefox PNG download
Capture a dropdown menu Snipping Tool with Delay Clipboard or file
No Windows key available Remapped Print Screen Clipboard
FAQs
What is the shortcut to snip on Windows?
Windows key + Shift + S. It works on both Windows 10 and Windows 11 and opens the capture toolbar instantly.
Why is my Ctrl + Shift + S not working?
Because Ctrl + Shift + S is not a Windows snipping shortcut. It opens Firefox’s screenshot tool or triggers “Save As” in most apps. Use Windows key + Shift + S instead.
How do you cut and paste with a Snipping Tool?
Press Win + Shift + S, drag over the area, then press Ctrl + V wherever you want it. The snip is copied to your clipboard automatically.
How do I crop a screenshot on Windows?
Open the snip in Snipping Tool, click the crop icon, drag the handles, and save. You can also crop in the Photos app or in Paint.
How do I snip in Chrome?
Win + Shift + S works over any Chrome window. For a full webpage, press F12, then Ctrl + Shift + P, and choose Capture full size screenshot.
How do I snip on Windows without the Windows key?
Turn on the Print Screen shortcut in Settings > Accessibility > Keyboard, then press PrtSc alone. You can also open the app from the Start menu or use Alt + Print Screen.
How do I snip on Windows and save to desktop?
After snipping, open the editor and press Ctrl + S, then choose Desktop. To make it permanent, move your Screenshots folder to the desktop in File Explorer.
Where does Windows save snips?
Win + Shift + S saves to the clipboard only. Win + Print Screen saves a file to Pictures > Screenshots. Screen recordings go to Videos > Screen Recordings.
Is Snipping Tool free?
Yes. It’s built into Windows 10 and Windows 11 at no cost, with no account or download required.
Where do I get the Snipping Tool download?
It’s preinstalled. If it’s missing, reinstall it from the Microsoft Store or repair it in Settings > Apps > Installed apps.
Can Snipping Tool capture a scrolling page?
Not on its own. Use Chrome Dev Tools’ full size screenshot or Firefox’s Save full page for free, or a third-party tool for desktop apps.
Does Snipping Tool replace Snip & Sketch?
Yes. Windows 11 merged the two older apps into a single Snipping Tool. Windows 10 still has both.
Can I record my screen with Snipping Tool?
Yes, on Windows 11. Press Win + Shift + R, select an area, and click Start. Recordings save to Videos > Screen Recordings.
Does Snipping Tool work with multiple monitors?
Yes. You can snip from any connected display, and full-screen mode captures all monitors at once.
Conclusion
Here’s everything above, compressed into what you’ll actually remember.
Win + Shift + S is the shortcut. It’s the same on Windows 10 and Windows 11. Nothing else is required.
Ctrl + Shift + S is not a Windows shortcut. If that’s what you’ve been pressing, that’s your whole problem solved.
Snips go to the clipboard, not a file unless you press Win + Print Screen or save manually from the editor.
Print Screen can replace the Windows key entirely via Settings > Accessibility > Keyboard. That fixes broken keys, locked keys, and remote sessions.
Most “not working” cases are shortcut conflicts from OneDrive, Discord, Dropbox or Nvidia software. Close them and re-test before anything else.
Scrolling captures are free in Chrome Dev Tools and Firefox. You don’t need to buy anything for webpage screenshots.
If you only take one thing away: press Win + Shift + S, drag then Ctrl + V. That covers about 90% of what anyone ever needs to do with a screenshot on Windows.
Read More information content Follow Wisinsider