How to Screen Record on Windows 10 and 11, Free and With Sound

A clip of your screen explains more than ten emails. Think of a bug your team cannot reproduce, a lesson for a student, or a setup guide for your parents. Windows can capture all of these without extra cost. This guide shows you how to screen record on Windows 10 and Windows 11, with sound, on any laptop or PC.
Short answer: Click inside the app you want to capture, then press Windows key + Alt + R. Press the same keys again to finish. The MP4 file waits in Videos, inside the Captures folder.
Which Way to Record Your Screen Fits Your Situation?
There is no single best tool. The right pick depends on what you need to capture and how fast you need it. Use this table as a shortcut to the right section.
| Your situation | Best tool | Start key |
| Quick clip of one app on Windows 10 | Xbox Game Bar | Windows key + Alt + R |
| Quick clip of any area on Windows 11 | Snipping Tool | Windows key + Shift + R |
| Whole desktop with voice and editing | Clipchamp | Open the app |
| Long lessons, webinars, many scenes | OBS Studio | Start Recording button |
| Video for a slide deck | PowerPoint | Insert, then Screen Recording |
| Short GIF for a help article | ShareX | Shift + Print Screen |
If you only need one clip today, try the first two rows. They need no download.
What Should You Do Before You Press Record?
Spend two minutes on prep. It saves you from recording the same minute five times.
- Quit apps you do not need, so nothing slows the PC.
- Switch on Do Not Disturb. A surprise chat preview can expose private details.
- Run winver (Windows key + R, then type it) to learn your exact Windows version.
- Speak a few words and watch the mic meter in Settings, then System, then Sound.
- Check free space on your drive. A few minutes of video can fill a gigabyte.
- Connect your laptop charger. Power saving mode often causes dropped frames.
How Do You Record Your Screen With an Xbox Game Bar?
Game Bar ships with both Windows 10 and Windows 11. You do not need to install, sign up, or pay. Microsoft built it for gamers, yet it handles most everyday apps just as well.
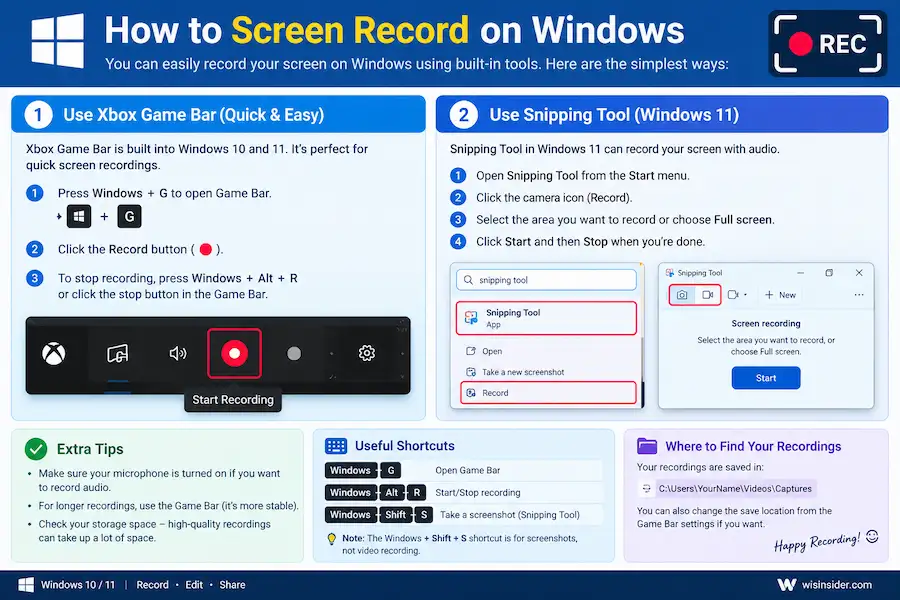
Here is the quickest route. Open the program you want to capture and click once inside it. Press Windows key + G to bring up the overlay. Find the Capture widget, then press the round record button. A small timer bar appears. When you finish, press Windows key + Alt + R. Your video lands in Videos, then Captures.
A few shortcuts make the job smoother:
- Windows key + Alt + R starts or stops a recording without opening the overlay.
- Windows key + Alt + M mutes or unmutes your microphone mid-recording.
- Windows key + Alt + G saves the last few moments, once background recording is on.
- Windows key + Alt + PrtScn takes a still image of the active app.
You can fine-tune results in Settings, then Gaming, then Captures. There you set the save folder, frame rate, quality, and whether the cursor shows. Thirty frames per second works well for software demos.
Game Bar has one firm rule. It captures only the focused app. The desktop and File Explorer are off limits, and the tool says gaming features are unavailable if you try. When you need a full-desktop video, pick another method below.
How Do You Use the Snipping Tool to Capture Video?
Windows 11 turned the Snipping Tool from a screenshot helper into a small video recorder too. It suits short, focused clips, because you draw a box and only that region is filmed.
You may know this app as a snip tool, snip it, or simply snip. It is all the same program. If you mostly want still images, see our walkthrough on how to use Snipping Tool.
Press Windows key + Shift + R, or open the app and choose the video camera icon. Drag across the part of the screen you want. Click Start and wait for the short countdown. Click Stop when you are done, check the preview, and save it. Files usually go to Videos, then Screen Recordings.
Audio support depends on your app version. Recent builds offer microphone and system sound toggles. If you do not see them, open the Microsoft Store, go to the Library, and update the app.
The trade-off is editing. You get a basic trim and not much else. For a polished lesson, send the clip into Clipchamp afterward.
Can PowerPoint Record Your Screen?
Yes, and it is an underrated trick. If your Microsoft 365 desktop app is already open, the recorder is one click away.
Open a blank slide and choose Insert, then Screen Recording. Pick Select Area to frame the region, then press Record. Work through your task and stop from the control bar at the top. The video drops onto your slide. Right-click it and pick Save Media As to export an MP4.
PowerPoint lets you toggle audio and the mouse pointer from the same bar. Keep in mind that the browser version of PowerPoint lacks this feature.
How Do You Record Your Screen With Clipchamp?
Clipchamp is Microsoft’s own free video editor, and it pairs recording with editing in one window. That makes it a smart choice when the raw clip needs trimming, titles, or captions.
Open the app and start a new video. Choose Record and create, then Screen recording. Allow microphone access, pick a screen, window, or browser tab, and press the red button. When you stop, the clip appears on the timeline, ready for edits. Export when you are happy.
The free plan exports at 1080p, which looks crisp on YouTube and in training portals. You will need to sign in first. It also comes preinstalled on Windows 11, so the experience feels most polished there.
Is OBS Studio the Best Free Screen Recorder for Windows?
OBS Studio is the heavyweight of free screen recording software. It is open source, carries no watermark, and has no time cap. Streamers rely on it, and so do teachers who record long classes.
The setup takes a few minutes. Install it from the official site. In the Sources panel, click the plus sign and add Display Capture for the full screen, or Window Capture for a single app. Glance at the audio mixer and confirm both your mic and desktop sound move when you make noise. Then press Start Recording and, later, Stop Recording.
OBS may save files as MKV by default. That format survives a crash better than MP4. To convert, open File, then Remux Recordings. You can also change the format in Settings, then Output.
OBS shines in these cases:
- You switch between several scenes or layouts.
- You want your webcam floating over the screen video.
- You need exact control over bitrate and quality.
- You record sessions that run for an hour or more.
Beginners often find its menus crowded. For a one-minute clip, it is more than you need.
What Can ShareX Do That Others Cannot?
ShareX is a free, open-source utility built for people who capture a lot. It records video, makes GIFs, takes screenshots, and can upload files for you.
Install it from the official site, open the Capture menu, and choose Screen recording. Select a region or the full screen. Shift + Print Screen starts and stops the capture. The first time, ShareX may ask to fetch FFmpeg, the engine that builds the video file. Say yes. Finished files go to Documents, then ShareX, then Screenshots.
It is a favorite for short GIFs in support articles. The learning curve is steeper than Snipping Tool, so give yourself an afternoon.
How Do the Free Recorders Compare Side by Side?
Use this chart when you cannot decide between two tools.
| Tool | Cost | Records full desktop | Built into Windows |
| Xbox Game Bar | Free | No, one app only | Yes |
| Snipping Tool | Free | Yes, by region | Windows 11 |
| PowerPoint | With Microsoft 365 | Yes, by region | With Office |
| Clipchamp | Free tier | Yes | Windows 11 |
| OBS Studio | Free | Yes | No |
| ShareX | Free | Yes | No |
Should You Pay for Screen Recording Software?
For most people, no. The free options above cover tutorials, bug reports, and lessons.
Paid tools earn their keep in specific cases:
- Camtasia bundles a full editor with effects and templates.
- Bandicam targets smooth, high-frame-rate game capture.
- ScreenPal and Loom make link sharing effortless for teams.
Buy only after you hit a real limit. Plans and prices change, so check the vendor’s site first.
How Do You Screen Record on Windows With Audio?
Sound trips up more beginners than anything else. Two different signals are involved. Microphone audio is your voice. System audio is whatever your PC plays, such as a video or a notification.
In the Game Bar, open Settings, then Gaming, then Captures, and choose what to record. During a take, Windows key + Alt + M toggles your mic. In OBS, speak and play a sound, then confirm the Mic/Aux and Desktop Audio bars both jump. If one stays flat, open Settings, then Audio, and choose the right device.
To record your screen and voice at once, enable the mic in Clipchamp, PowerPoint, or OBS before pressing record. To capture PC sound plus your voice, use OBS or the newest Snipping Tool.
Always run a ten-second rehearsal. Play it back with headphones. It takes less time than redoing a full session.
Does Screen Recording Work the Same on Windows 10 and 11?
Mostly yes. The main difference is the video recorder inside Snipping Tool, which is a Windows 11 feature.
- Windows 10: Rely on Game Bar, PowerPoint, Clipchamp, OBS, or ShareX. Microsoft ended regular support for Windows 10 in October 2025, so plan an upgrade.
- Windows 11: Use Snipping Tool for fast clips. Use Game Bar or Clipchamp when you need more.
What If You Still Use Windows 7?
Windows 7 has no built-in video recorder. Its Steps Recorder produces screenshots with notes, not video. Support for the system ended in January 2020, and many current tools no longer install on it. Check each tool’s requirements, or record on a newer PC.
How Do You Record Your Screen on a Laptop, PC, or Desktop?
The method does not change with the hardware. A Dell, an HP, a custom desktop, or an all-in-one PC all use the same Windows tools.
- On a Dell laptop running Windows 10, click inside your app and press Windows key + Alt + R.
- On an HP laptop running Windows 11, press Windows key + Shift + R for Snipping Tool.
- On a desktop PC, use the same shortcuts and plug in a headset or USB mic first.
Some laptops lock the top row to media functions. If a shortcut seems dead, hold Fn as well, or toggle the Fn lock key.
Should You Record One Window or the Whole Screen?
Choose based on your audience. Viewers follow a single window more easily because less is happening around it.
- One app: Game Bar or OBS Window Capture.
- A custom region: Snipping Tool or PowerPoint.
- Entire display: Clipchamp, OBS Display Capture, or ShareX.
- Several monitors: OBS, where you pick the exact display.
For tutorials, resize the app to around 1280 by 720 pixels. It plays back sharply on most devices.
How Do You Take a Screenshot on Windows?
Sometimes a single image says it all. A screenshot, sometimes called a screen shot or ss, takes a second. These shortcuts work on Windows 10 and Windows 11.
| Shortcut | Result |
| PrtScn (Print Screen) | Copies the full screen to the clipboard |
| Windows key + PrtScn | Saves the full screen to Pictures, then Screenshots |
| Alt + PrtScn | Copies only the active window |
| Windows key + Shift + S | Opens the snip bar so you can choose an area |
| Windows key + Alt + PrtScn | Saves a Game Bar image to Videos, then Captures |
Many laptops need Fn + PrtScn instead. After copying, paste with Ctrl + V into Paint, Word, or an email.
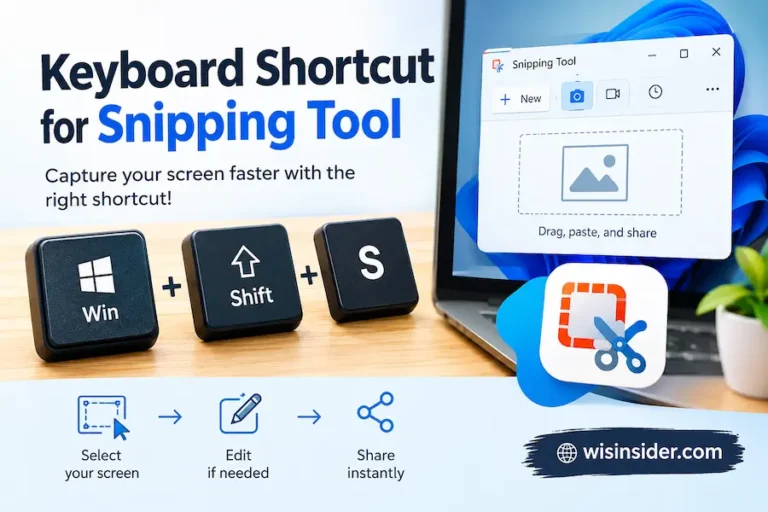
Most people lean on Windows key + Shift + S. Our guide to the keyboard shortcut for Snipping Tool lists more ways to capture. If a saved image seems to vanish, read where screenshots go on Windows.
Why Is Your Screen Recording Failing on Windows?
Most failures have quick fixes. Match your symptoms below.
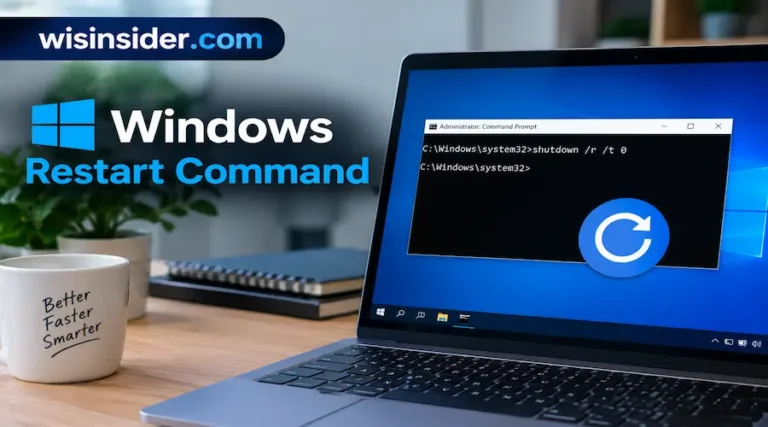
Game Bar will not appear. Open Settings, then Gaming, then Xbox Game Bar, and confirm it is on. Check that the shortcut was not changed. Still nothing? Restart the PC. Our guide to the Windows restart command shows fast ways to do it.
Windows says gaming features are unavailable. You are on the desktop or File Explorer. Click into a regular app, or switch to Snipping Tool, Clipchamp, or OBS.
The video has no sound. Confirm the correct mic in Sound settings. Then open Settings, Privacy and security, Microphone, and allow access for the app. Run a ten-second test.
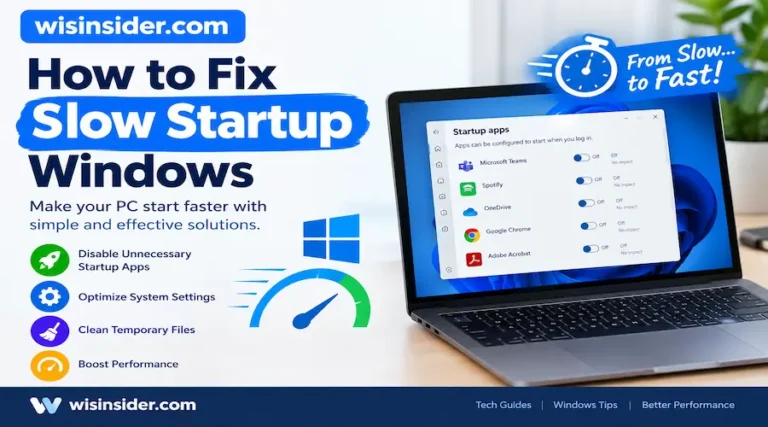
The footage is choppy. Close heavy programs, drop to 30 frames per second, and try OBS’s hardware encoder if your graphics card supports it. A sluggish PC may need broader care, so see how to fix slow startup on Windows.
The picture goes black. Protected streaming content often blocks capture on purpose. Turning off browser hardware acceleration sometimes helps for other pages. Follow the rules of whatever you record.
The file is too large. Lower resolution or frame rate before the next take. A free converter like HandBrake can shrink finished clips.
Where Do Your Recordings Go?
Knowing the default folders saves a lot of hunting.
- Game Bar saves to Videos, then Captures.
- Snipping Tool saves to Videos, then Screen Recordings.
- Clipchamp saves wherever you export, often Downloads.
- OBS saves to Videos unless you change it in Settings, then Output.
- ShareX saves to Documents, then ShareX, then Screenshots.
To move the Game Bar folder, right-click Captures, choose Properties, then Location, and pick a drive with more room.
How Can You Make Your Recordings Look Professional?
Clean input beats clever editing. Build these habits and your clips will look far better.
- Hide desktop icons and close personal tabs.
- Record in a quiet room. Noise hurts more than a lower resolution.
- Use a headset or desk mic. Laptop mics amplify keyboard clatter.
- Move the mouse slowly and with purpose.
- Raise text size so words stay readable on a phone.
- Jot three bullet points before you start, so you do not ramble.
- Trim dead air from the start and end.
Short clips are easier than one perfect take. Record each step separately and join them later.
What Resolution and Frame Rate Should You Pick?
For most videos, 1080p at 30 frames per second hits the sweet spot. It stays sharp and keeps files small.
- Software demos and lessons: 1080p at 30 fps.
- Gameplay: 1080p at 60 fps for smoother motion.
- Quick bug reports: 720p at 30 fps.
- Detailed design work: 1440p or 4K, if your drive and screen allow.
Higher settings demand more power and storage, so match them to your goal.
How Do You Edit and Share a Recording?
Your first take is only a draft. A little polish pays off.
- Trim mistakes in Clipchamp, the Photos app, or Snipping Tool.
- Add captions in Clipchamp so muted viewers can follow.
- Compress big files with HandBrake before sending by email or chat.
- Share through YouTube, Google Drive, OneDrive, or your team chat.
Use restricted links for private clips. Never post a video that reveals passwords or personal data.
Is Recording Your Screen Legal?
Recording your own screen is usually fine. Problems start when you capture other people or protected media.
- Get consent before recording meetings or calls with others.
- Recording laws vary by country and by state.
- Do not share copyrighted material you have no rights to.
- Blur or hide customer data and credentials.
This is general information and not legal advice.
FAQs
How do I screen record on Windows 10?
Open the app, click inside it, and press Windows key + Alt + R. Press it again to stop. Find the MP4 in Videos, then Captures.
How do I screen record on Windows 11?
Press Windows key + Shift + R to start the Snipping Tool recorder. Draw a box, press Start, and stop when finished. Game Bar also works.
How do I record my screen on Windows 11 with audio?
Use the newest Snipping Tool, Clipchamp, or OBS. Switch on the mic or system sound toggle before recording, and run a quick test.
How to screen record on Windows with a mic?
Enable your microphone in the tool’s toolbar or settings. In the Game Bar, press Windows key + Alt + M. In OBS, watch the Mic/Aux meter.
How do I record my screen on Windows 10 with audio?
Game Bar and OBS both work. In the Game Bar, choose your audio option under Settings, Gaming, Captures, then press Windows key + Alt + R.
Is there a free screen recorder for Windows without a watermark?
Yes. Game Bar, Snipping Tool, and OBS Studio add no watermark. Clipchamp’s free tier also exports 1080p video without one.
Can Windows record my whole desktop?
Game Bar cannot. Use Snipping Tool, Clipchamp, OBS Studio, or ShareX instead.
How long can I record?
The Game Bar has a maximum length you can set. OBS has no built-in cap. Your real limit is free disk space.
What file format do screen recordings use?
Game Bar and Snipping Tool save MP4. OBS may use MKV by default, and you can remux it to MP4.
Can I record without downloading anything?
Yes. Game Bar and Snipping Tool are built in. PowerPoint and Clipchamp may already be on your PC.
Conclusion
You now know how to screen record on Windows with six free tools and a clear way to choose. Begin with Windows key + Alt + R or Windows key + Shift + R. Move to Clipchamp or OBS only when a simple tool falls short.
Remember the basics. Silence alerts, rehearse your audio, and record in short pieces. Those habits matter more than any app.
Which method will you test first? Share your favorite tip in the comments.